 Free Inventory software
- 3DT Inventory system is part of ERP package.
- It supports multiple warehouses and has provision to record rack information to track where items are stored.
- Barcode Labels could be generated and stuck on items for standardizing purpose.
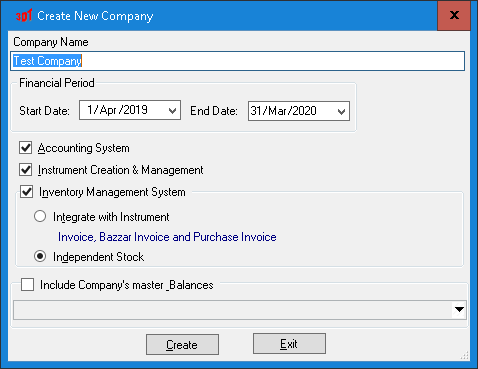
Inventory is optional feature and need to be enabled during company creation. Inventory could be activated with Integrated with instruments or could be maintained independently. When created in Integrated mode all purchases and sales would add and deduct items from stock. In integrated mode, items could not be sold if they are not available. The ideal configuration is to have inventory maintained independently. This will help you raise invoices without having item in stock. The following is configuration setting you need to select while creating a new company. The default is Independent Stock option.
- To download and install click here
Highlights of Free Inventory system
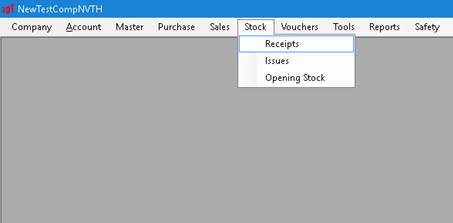
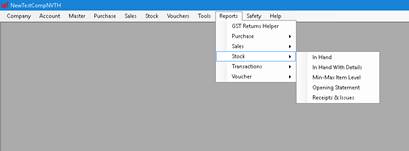
To open this module, one has to login 3DT ERP using
userId: Admin
pwd: Admin
And navigate to Stock as shown below
All receipts you get from Purchase, sales returns, Assembly or sub-contract could be recorded through receipts module. Its interface looks like follows
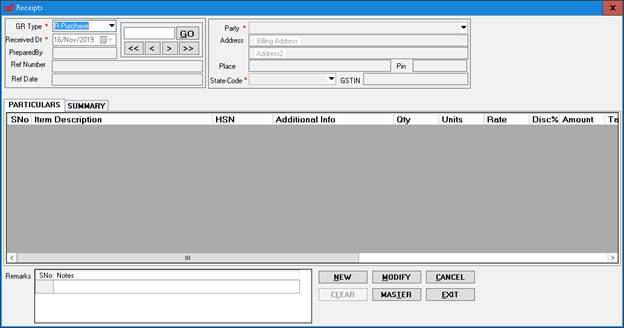
To raise a new receipts carry out the following steps
- Click on New button.
- Select the GR-Type and enter information in other fields. To create new party use Master button and have them created.
After entering all the mandatory fields (*) and other relevant fields, click on Add button which will be visible in Particular tab.
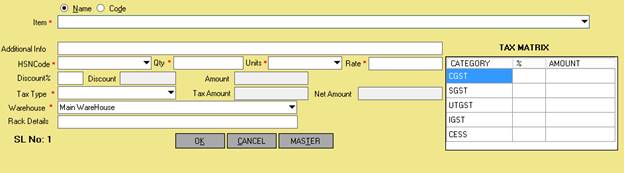
- Enter fields which are mandatory in above form; you can search items by name or by code manually or use code through barcode scanner. If there is alternative name defined for the party, it would be displayed below the item fields. If it is a new item create them through Master button.
After filling all the information click on OK button. This will add items to the particular block. To add more item, click on Add button. Refer the following screen for more info.
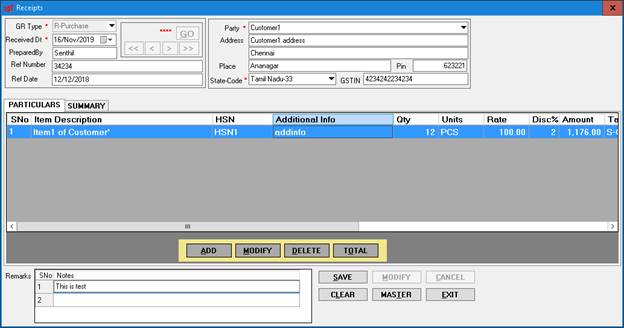
- Once all items are added, click on Total button. This would show you the summary tab and click on Save button.
- With this you have added stock to your inventory.
Like wise we have Issue module which will cover Sales, purchase returns, assembly and subcontract to deduct goods from inventory.
To download and install click here
Reports for Inventory
3DT has following reports available for your inventory management.
Barcode
You can incorporate Barcode in your warehouse and track item through it. Barcode module is available at Tools -> Label Generator -> Item with barcode menu option. The following is its interface
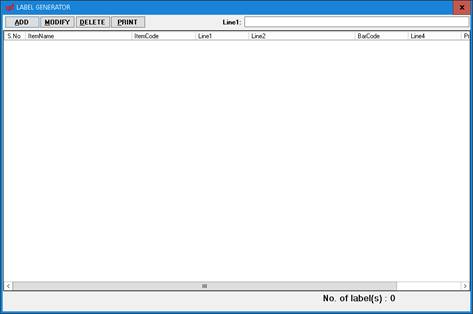
To print barcode, you need to carry out the following steps
Click on Add button, the following wizard gets loaded.
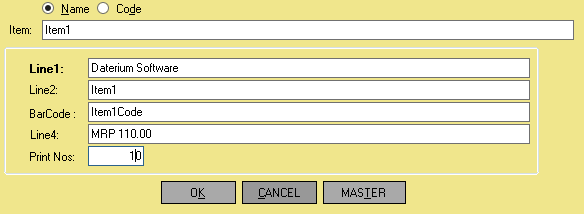
- Select item either through Name or via Code. Line2, Barcode and Line4 fields gets populated with Item description, Item code and MRP of item. These fields could be over writen with your inputs.
- In Line1 you could enter your company Name or Brand name of the product and in Print Nos: you need to enter number of labels you want to generate.
- Once all fields are entered you need to click on OK button to add the item to the grid.
You can repeat step 1 to 4 to add more items to grid.

Modify and Delete buttons could be used to modify or delete rows in grid. To generate label click on Print button and you would see the following barcode labels generated

For best results use water proof ink printer, to print your labels.
To download and install click here
inventory software is robust and should fulfill all your inventory requirements.
To know more about free GST billing software click here
To know more about free accounting software click here